Last Year, Labor Day '08, North Georgia
After moderate success in setting off 200+ bottle rockets simultaneously, a new goal for the next year was needed. Over beers, a decision was made: Ignite a model rocket underwater, successfully transitioning to stable vertical flight in air.
Given the need to ignite the engine, as well as the cardboard construction of the rocket's body tube, we needed a way to keep the rocket dry at least until the engine was firing. A PVC pipe based launch tube was the obvious solution.
Sealing the top was problematic. We needed a material that is strong enough to keep the air in the tube (and the water out), while not impeding the rocket's progress after being struck by the nose cone. Aluminum foil seemed to have the desired properties. Relatively strong, but the slightest hole tears easily.
June '09, California
But is aluminum foil strong enough? And how to attach it to the PVC pipe? This calls for some experimentation.
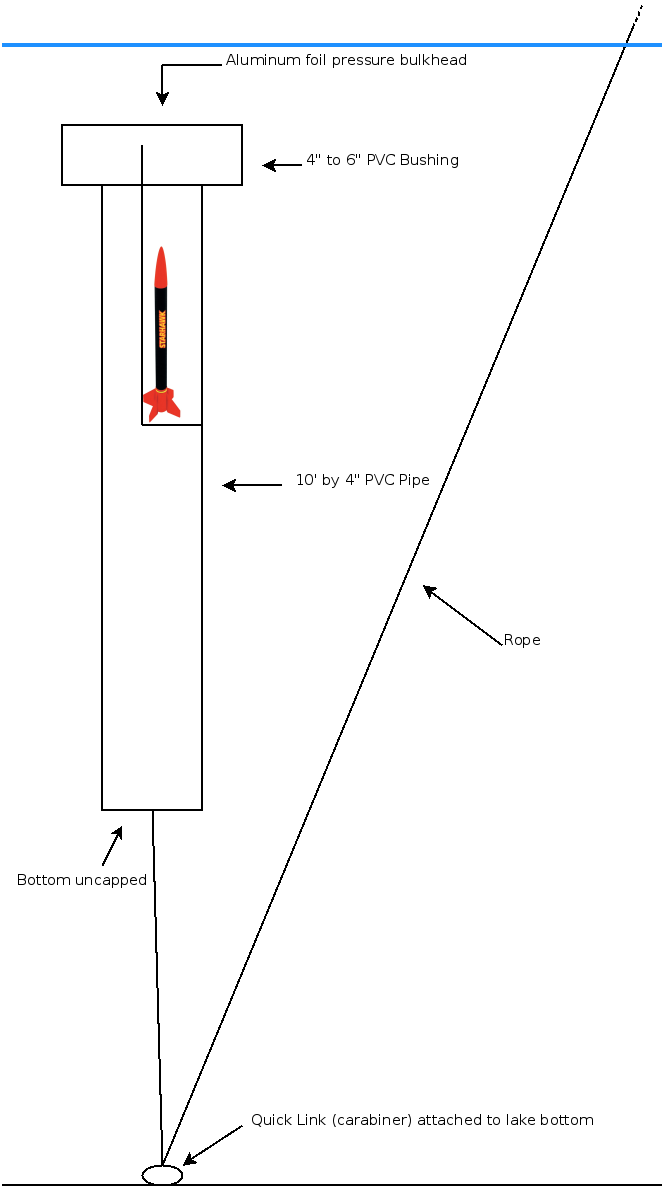
The lift force of air in a 10 foot PVC pipe with 4" diameter is 24680 grams (Thanks Wolfram Alpha) or 54 pounds. Using a 4 inch to 6 inch bushing to spread that force over a 6 inch diameter circle gives us just under 2 PSI on the foil.
So we made a ~1/5 scale prototype out of a 2 foot segment of 1 inch PVC pipe. Fortuitously, the average human can exhale with a force of approximately 2.5 PSI, so if our prototype survives us blowing into it (while filled with water, to make leaks more obvious), we should have a nice 0.5 PSI safety margin.
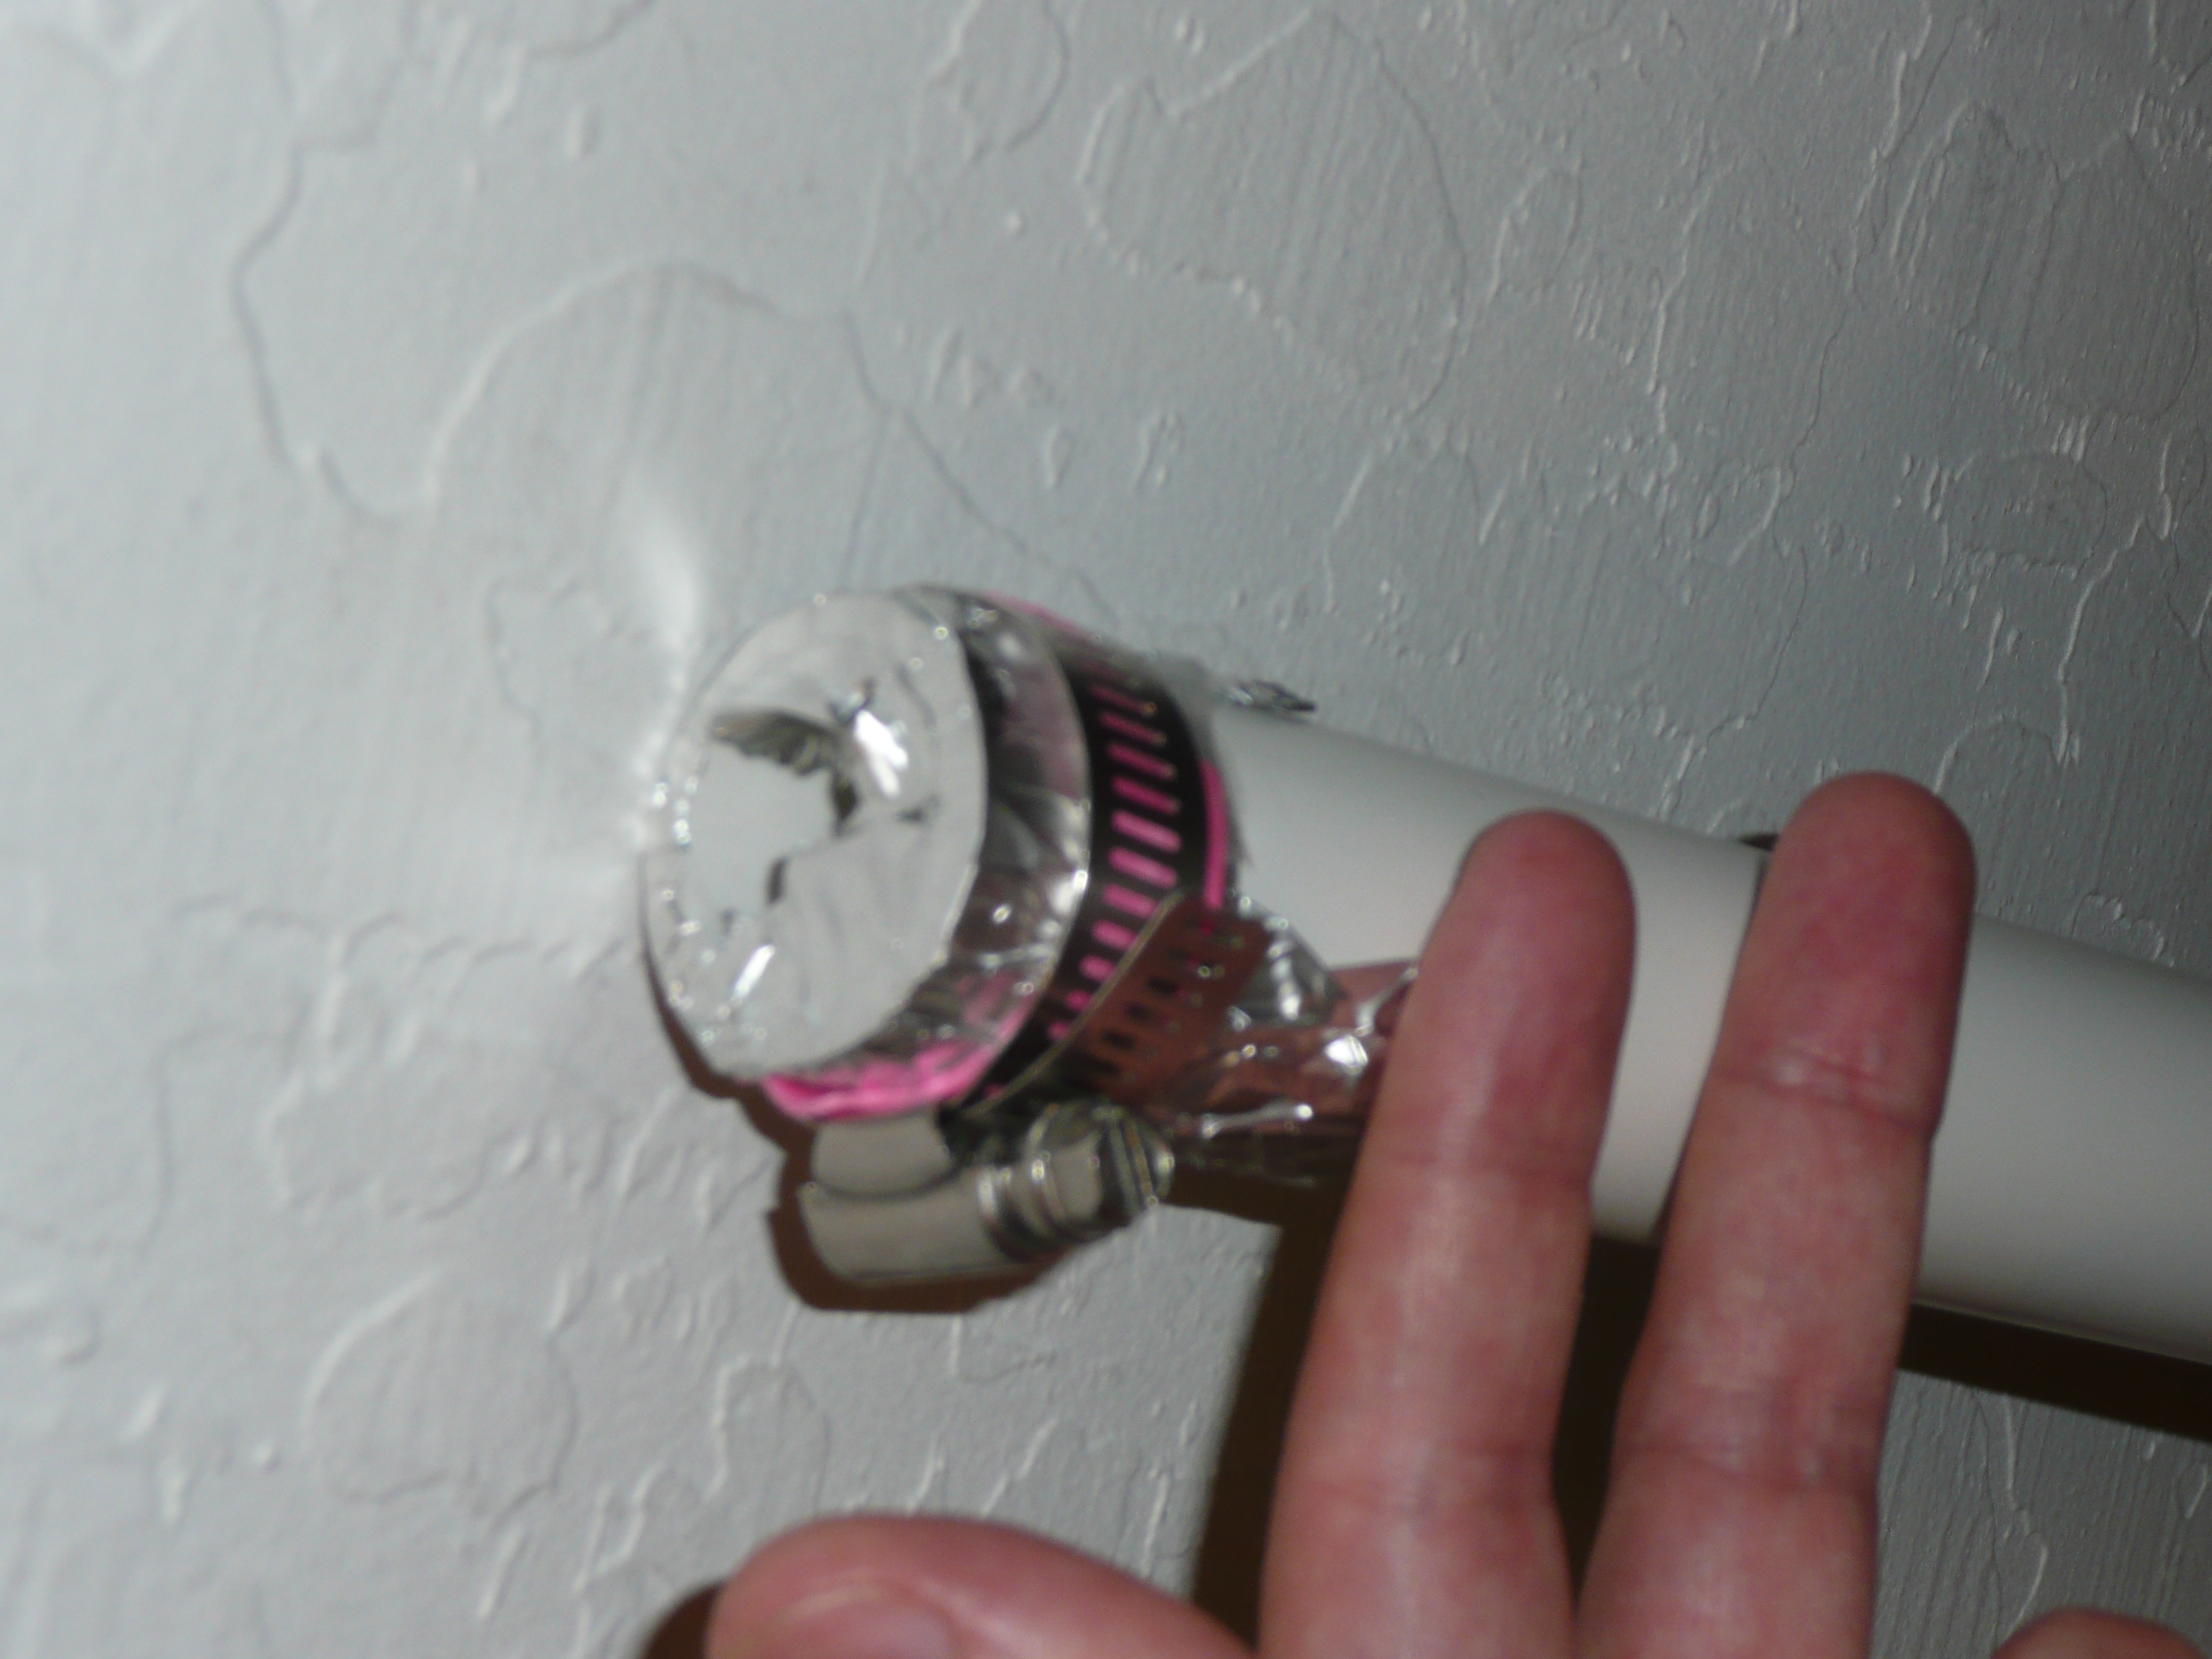
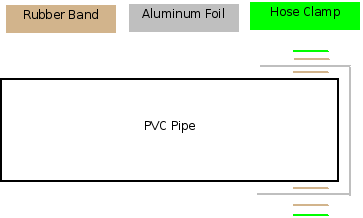
Success: A double layer of foil, with a rubber band underneath the foil, as well as one on top, all clamped down with a hose clamp. Pressure test was successful, and the foil was easy to penetrate even without any pressure on it! The outward pressure of the air in the production apparatus should make penetration even easier.
To drag the apparatus down to depth, and to anchor it there, we needed a rope, and some way to attach it to the lake bottom. Our initial attempt using cinderblocks was a failure. The cinderblocks kept getting lifted off the bottom.
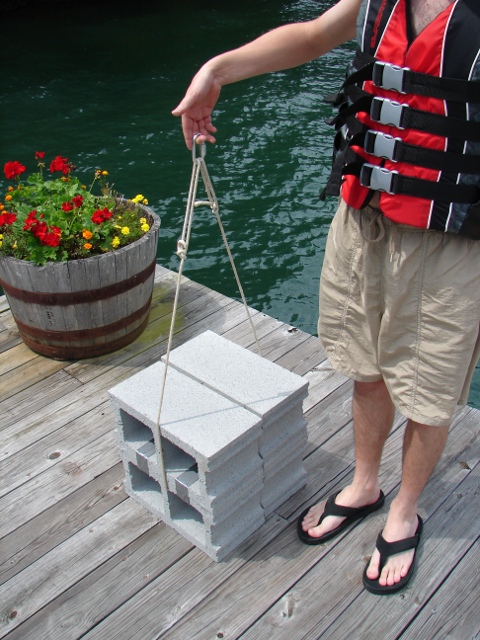
Fortunately, they proved useful in hoisting a 2x6 down to ~16 foot depth, which was then nailed to one of the wooden columns that supports the dock. A simple quick link attached to the 2x6 served as a makeshift pulley.
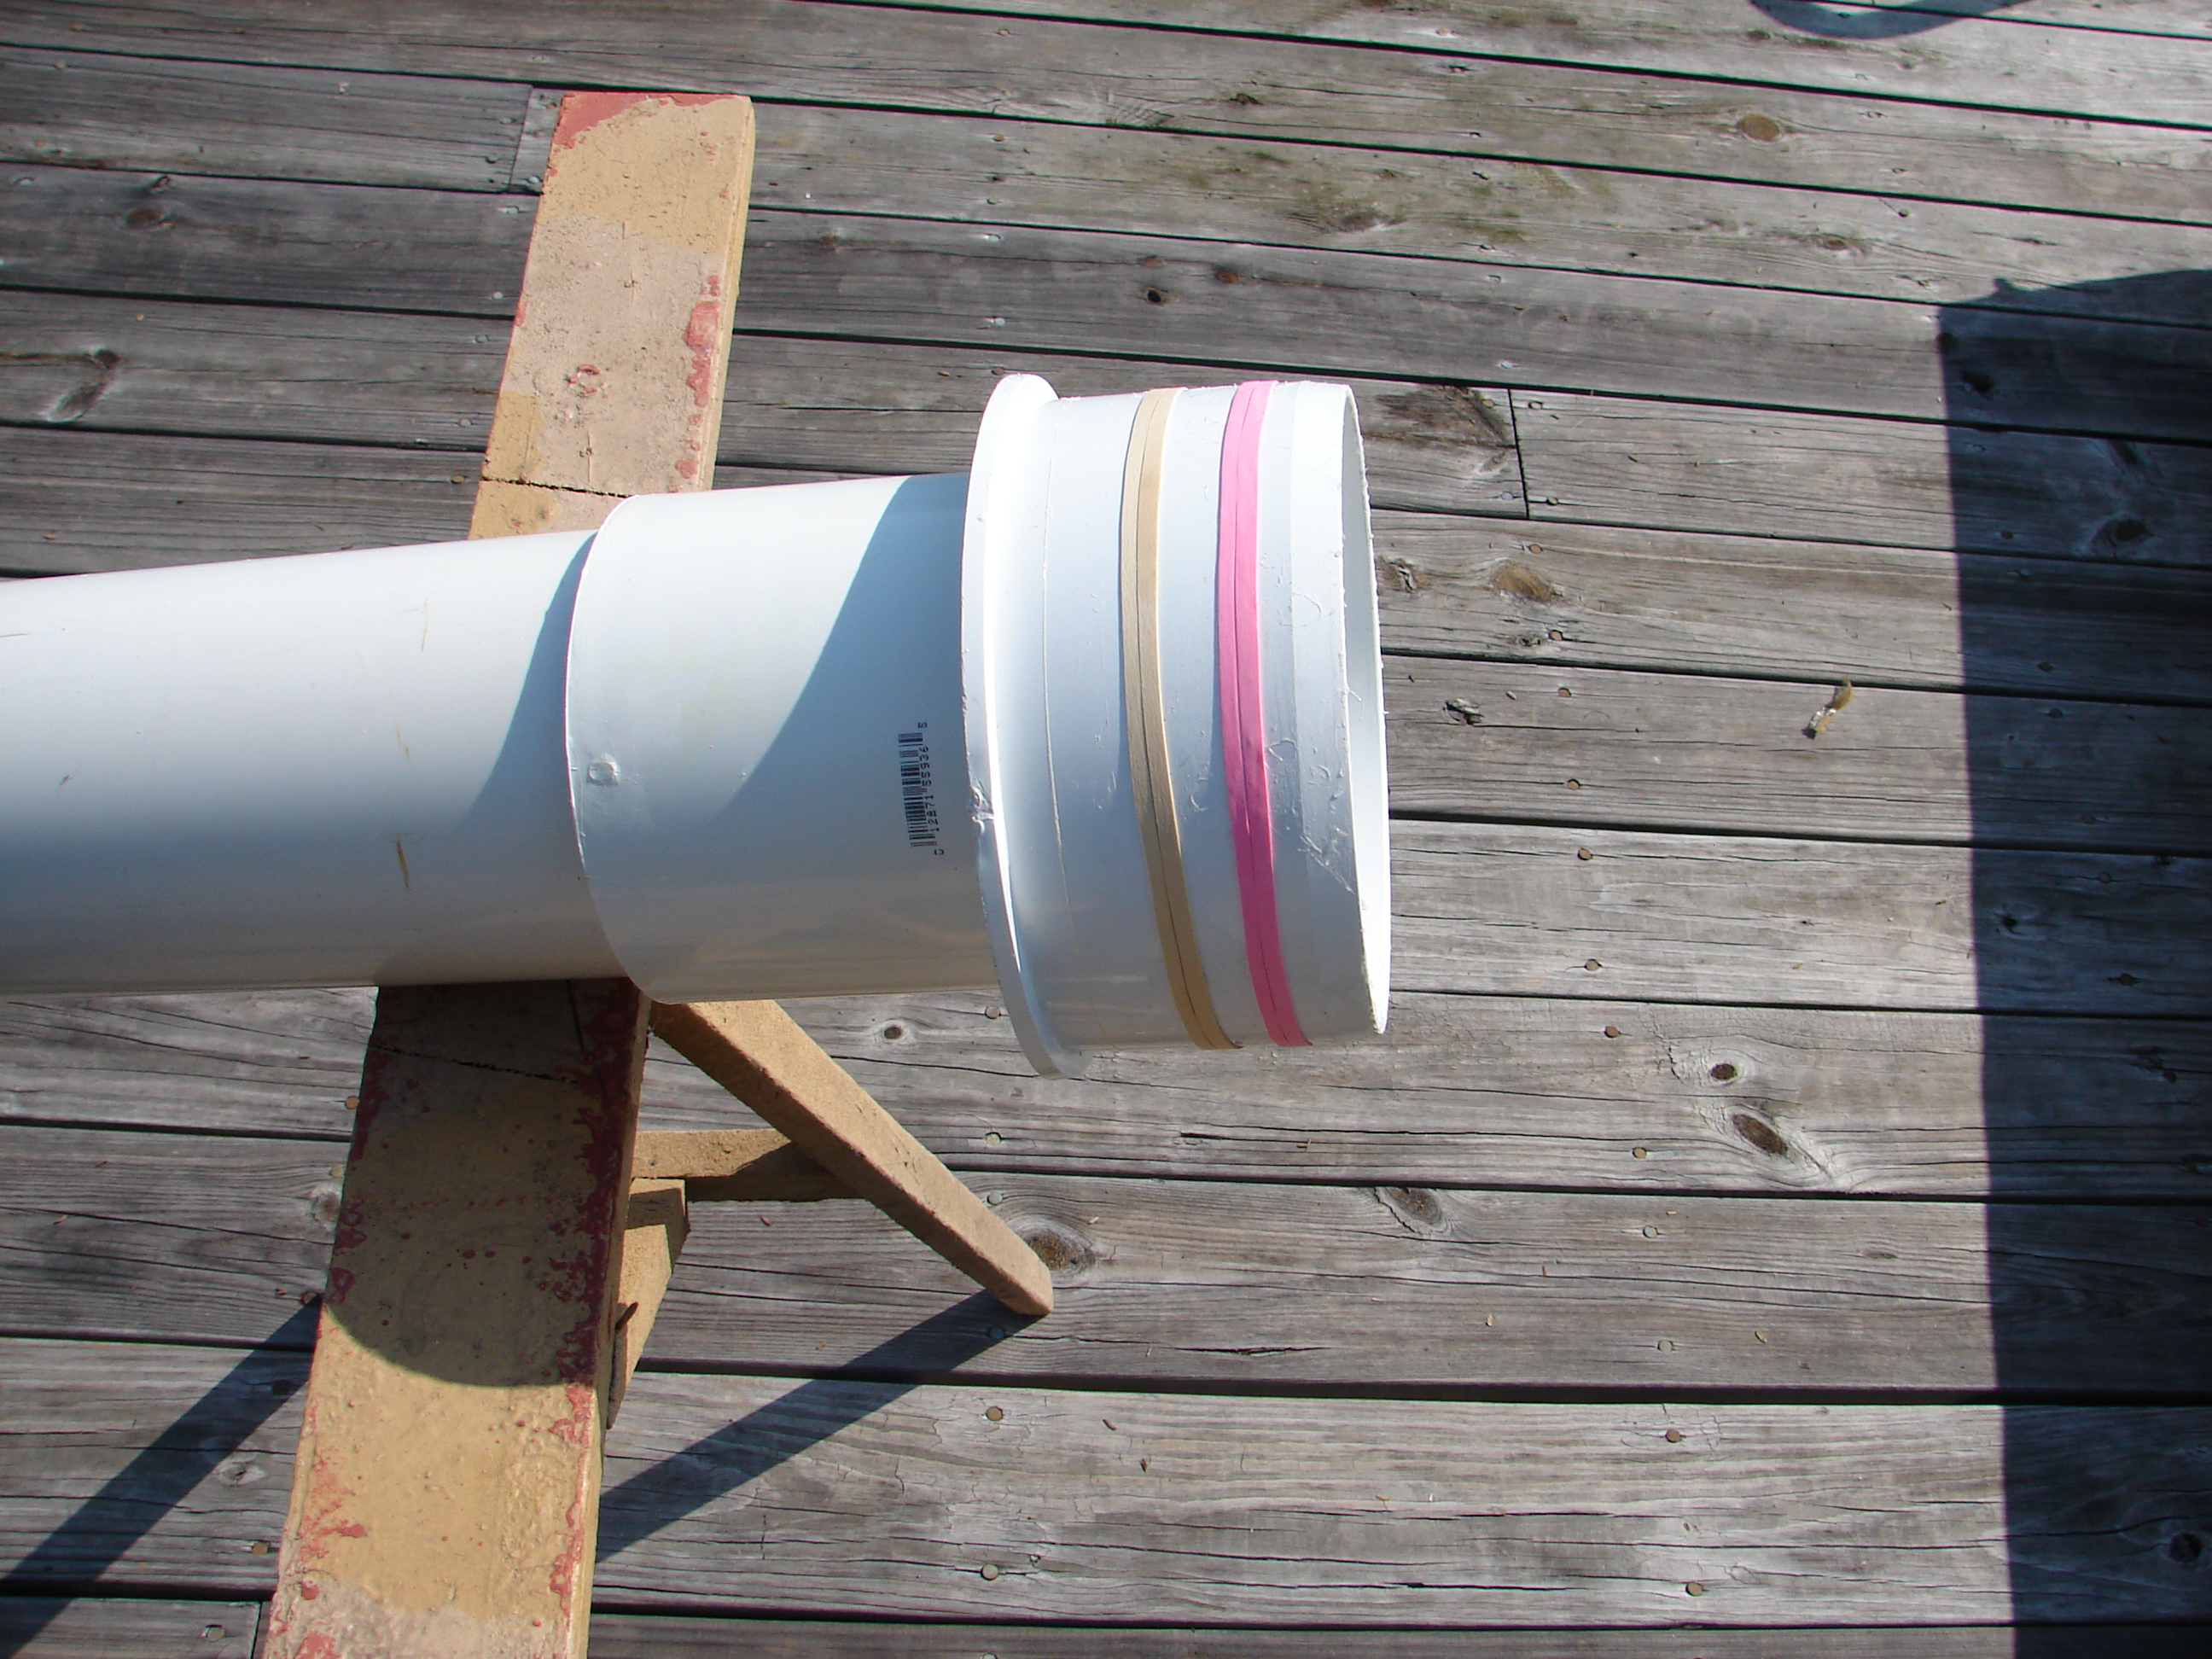
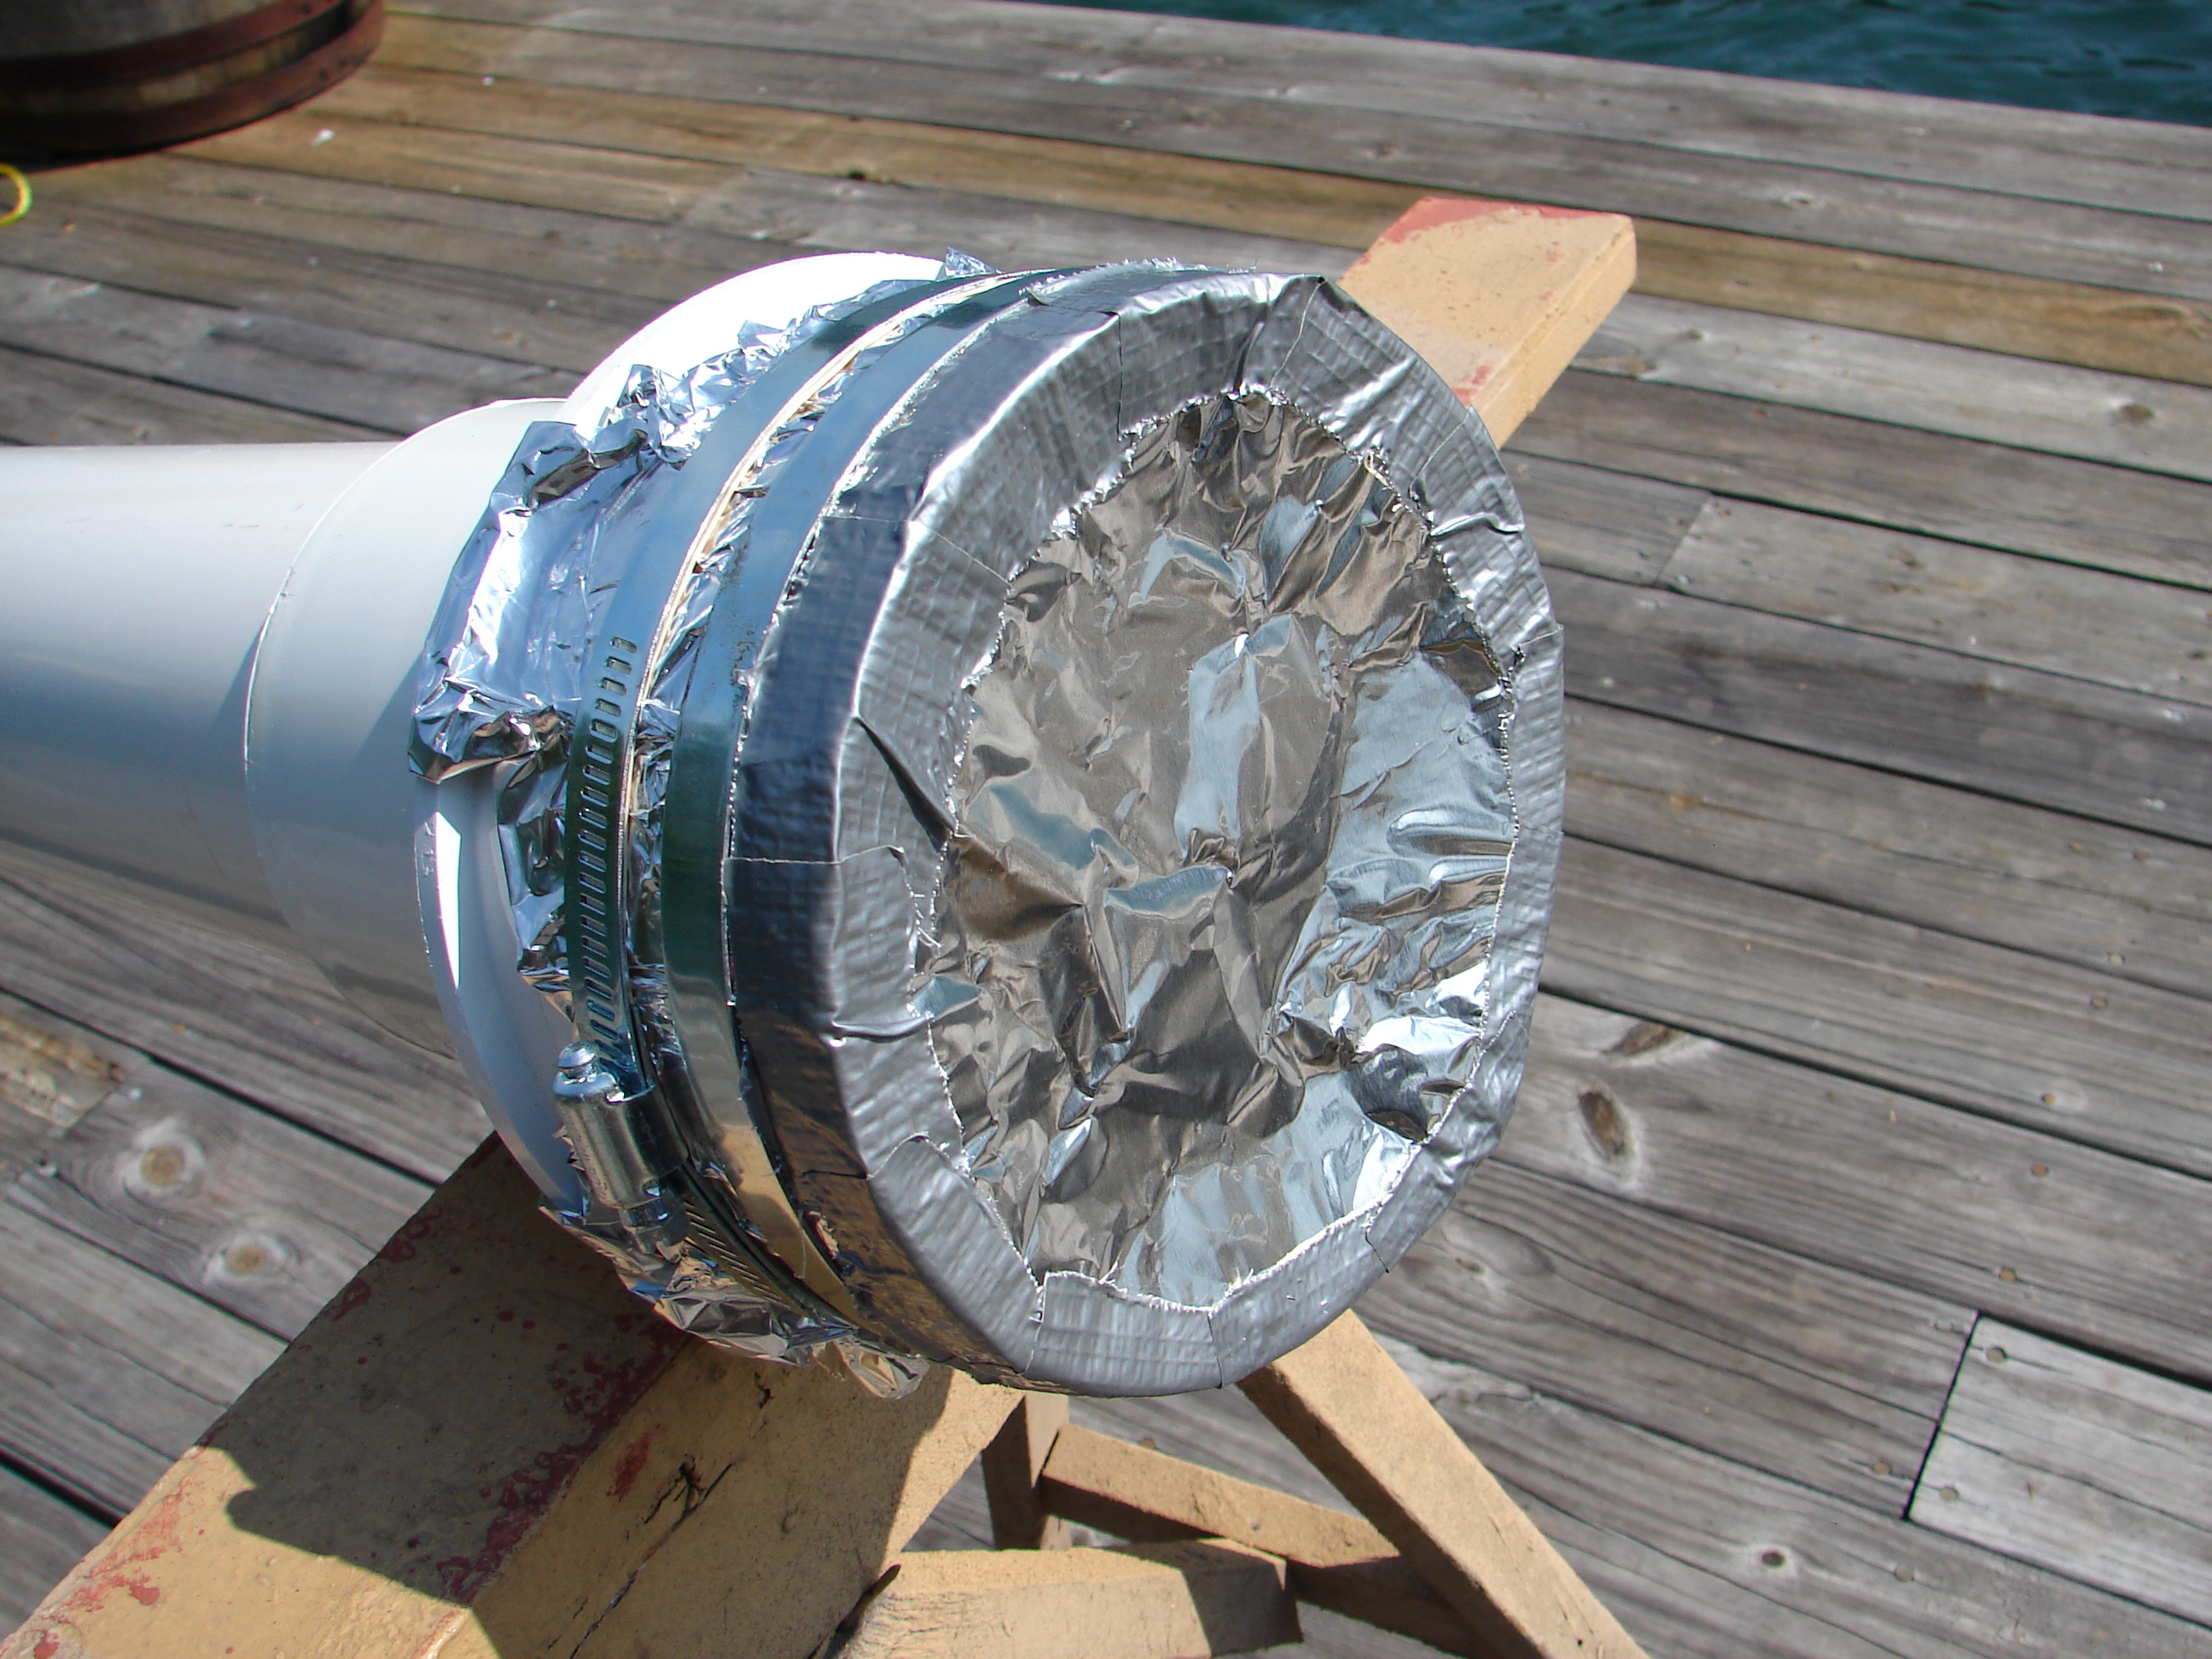
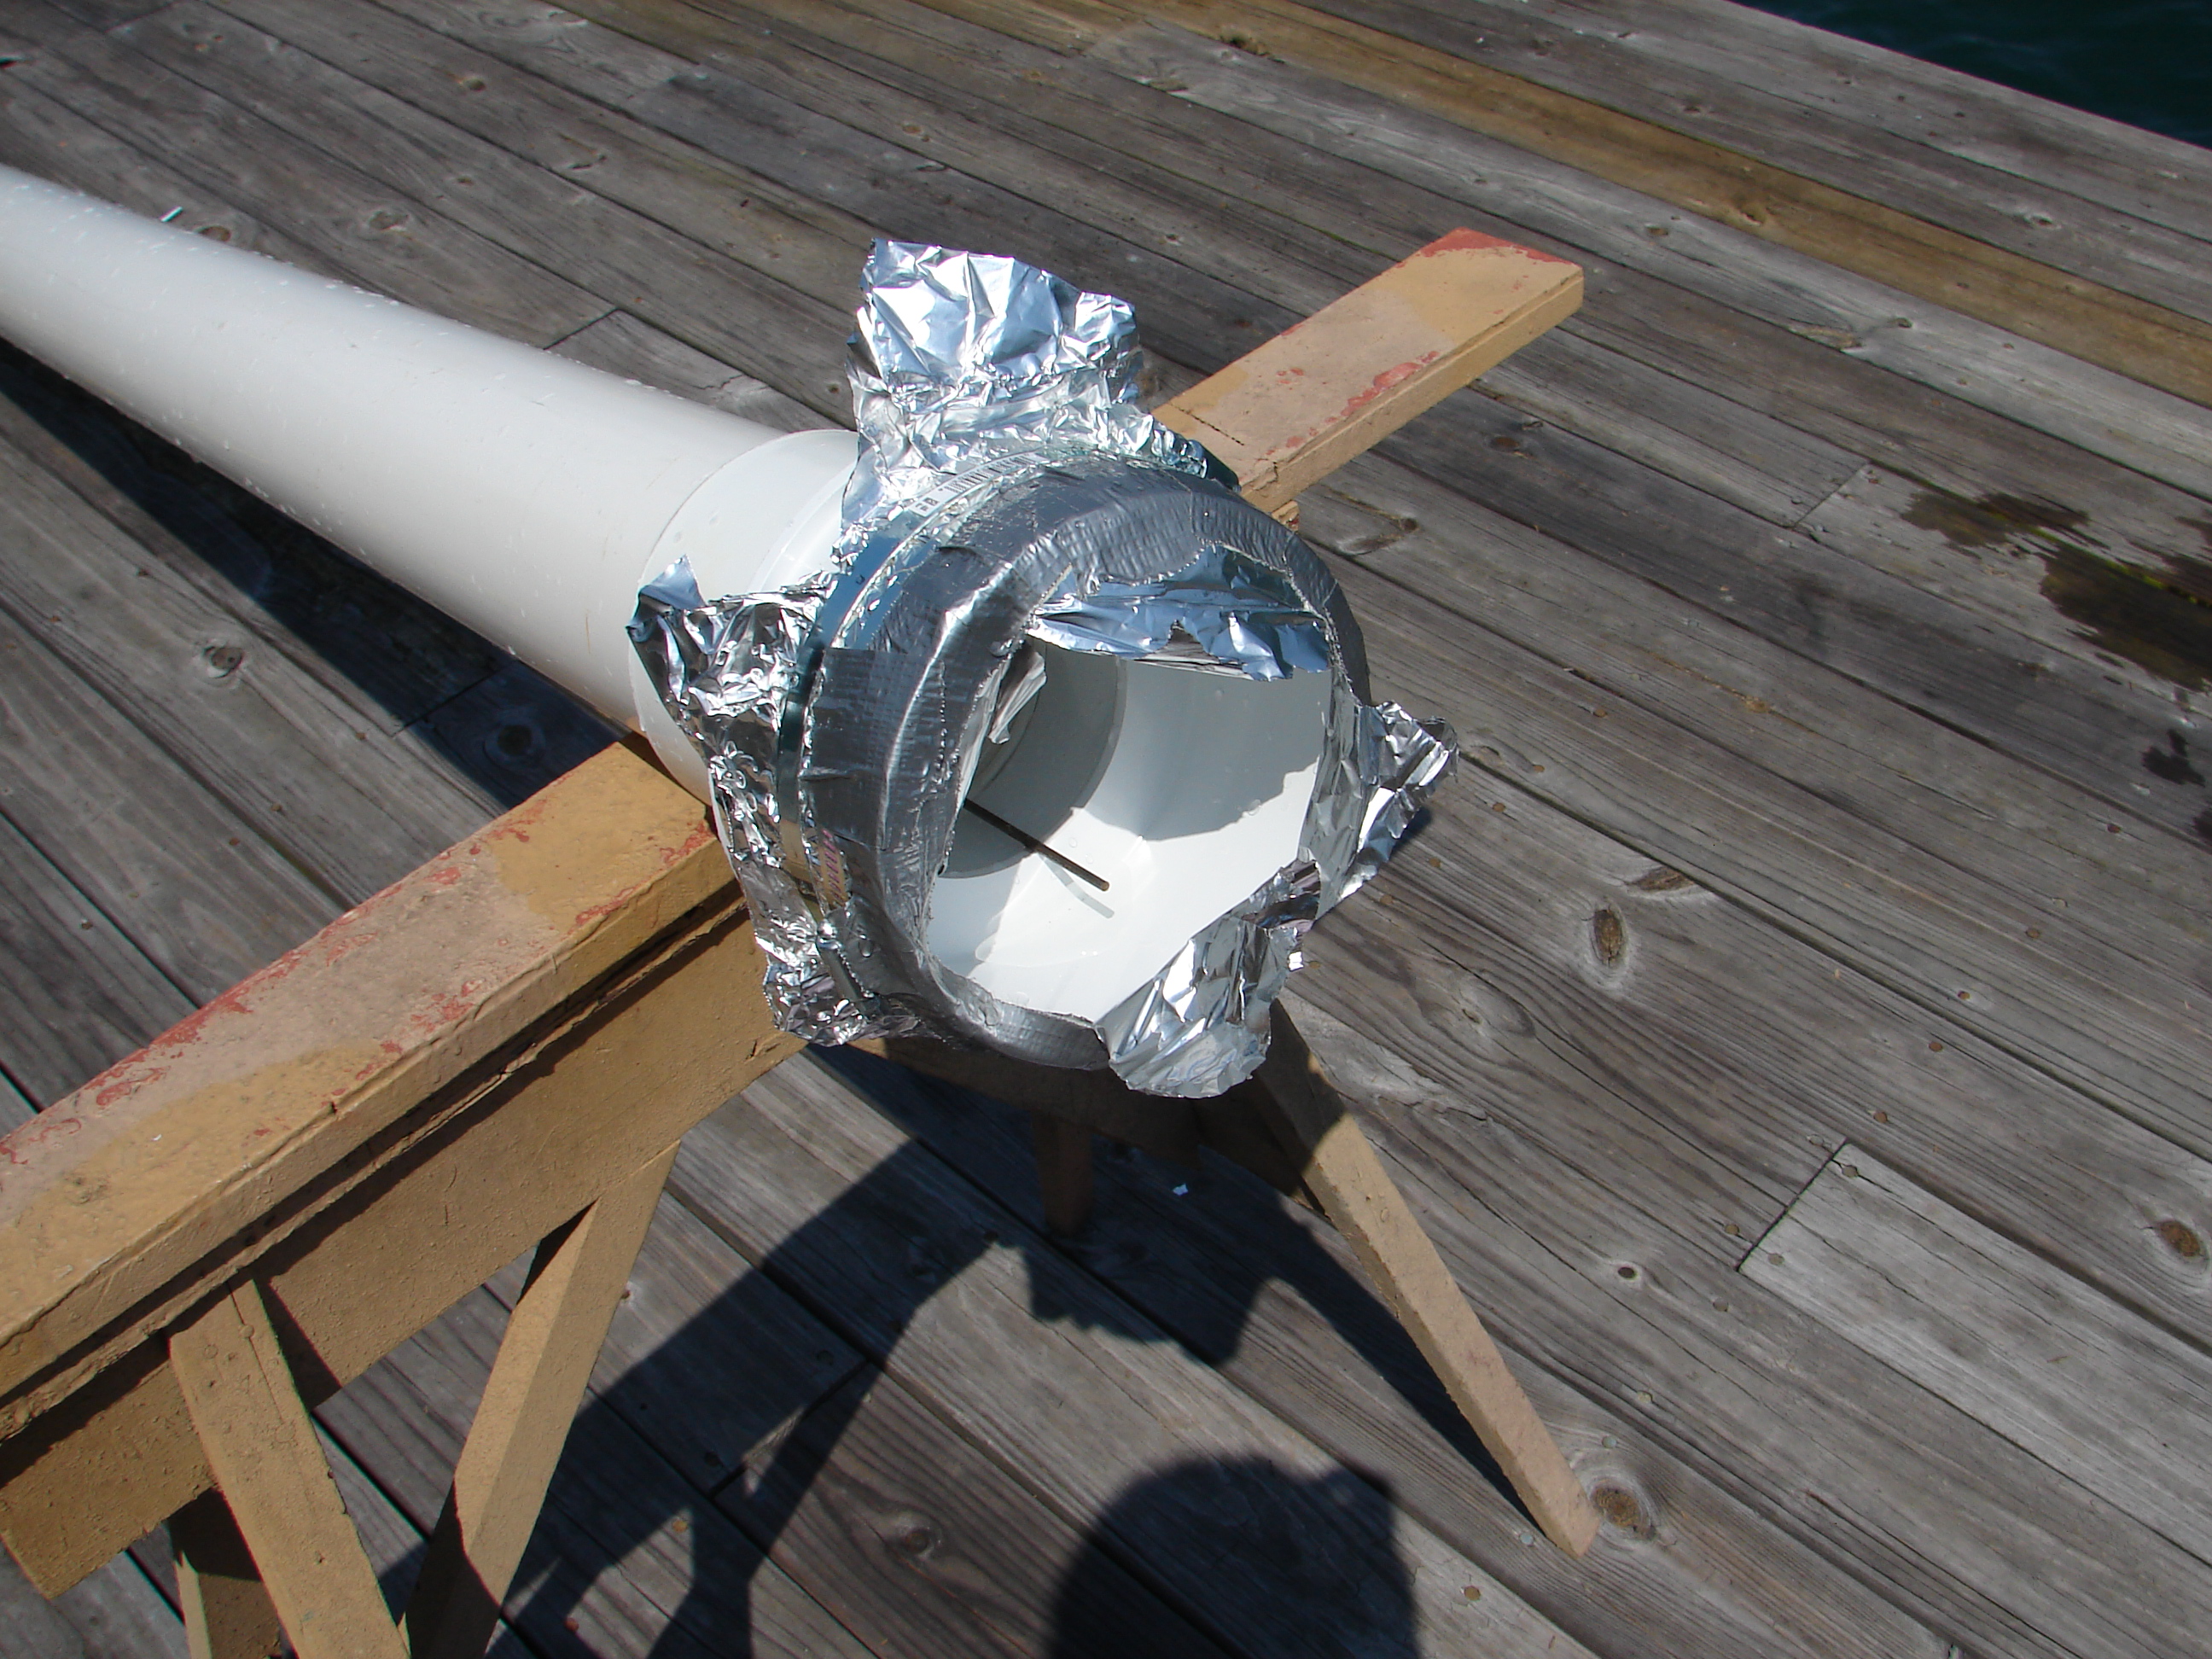
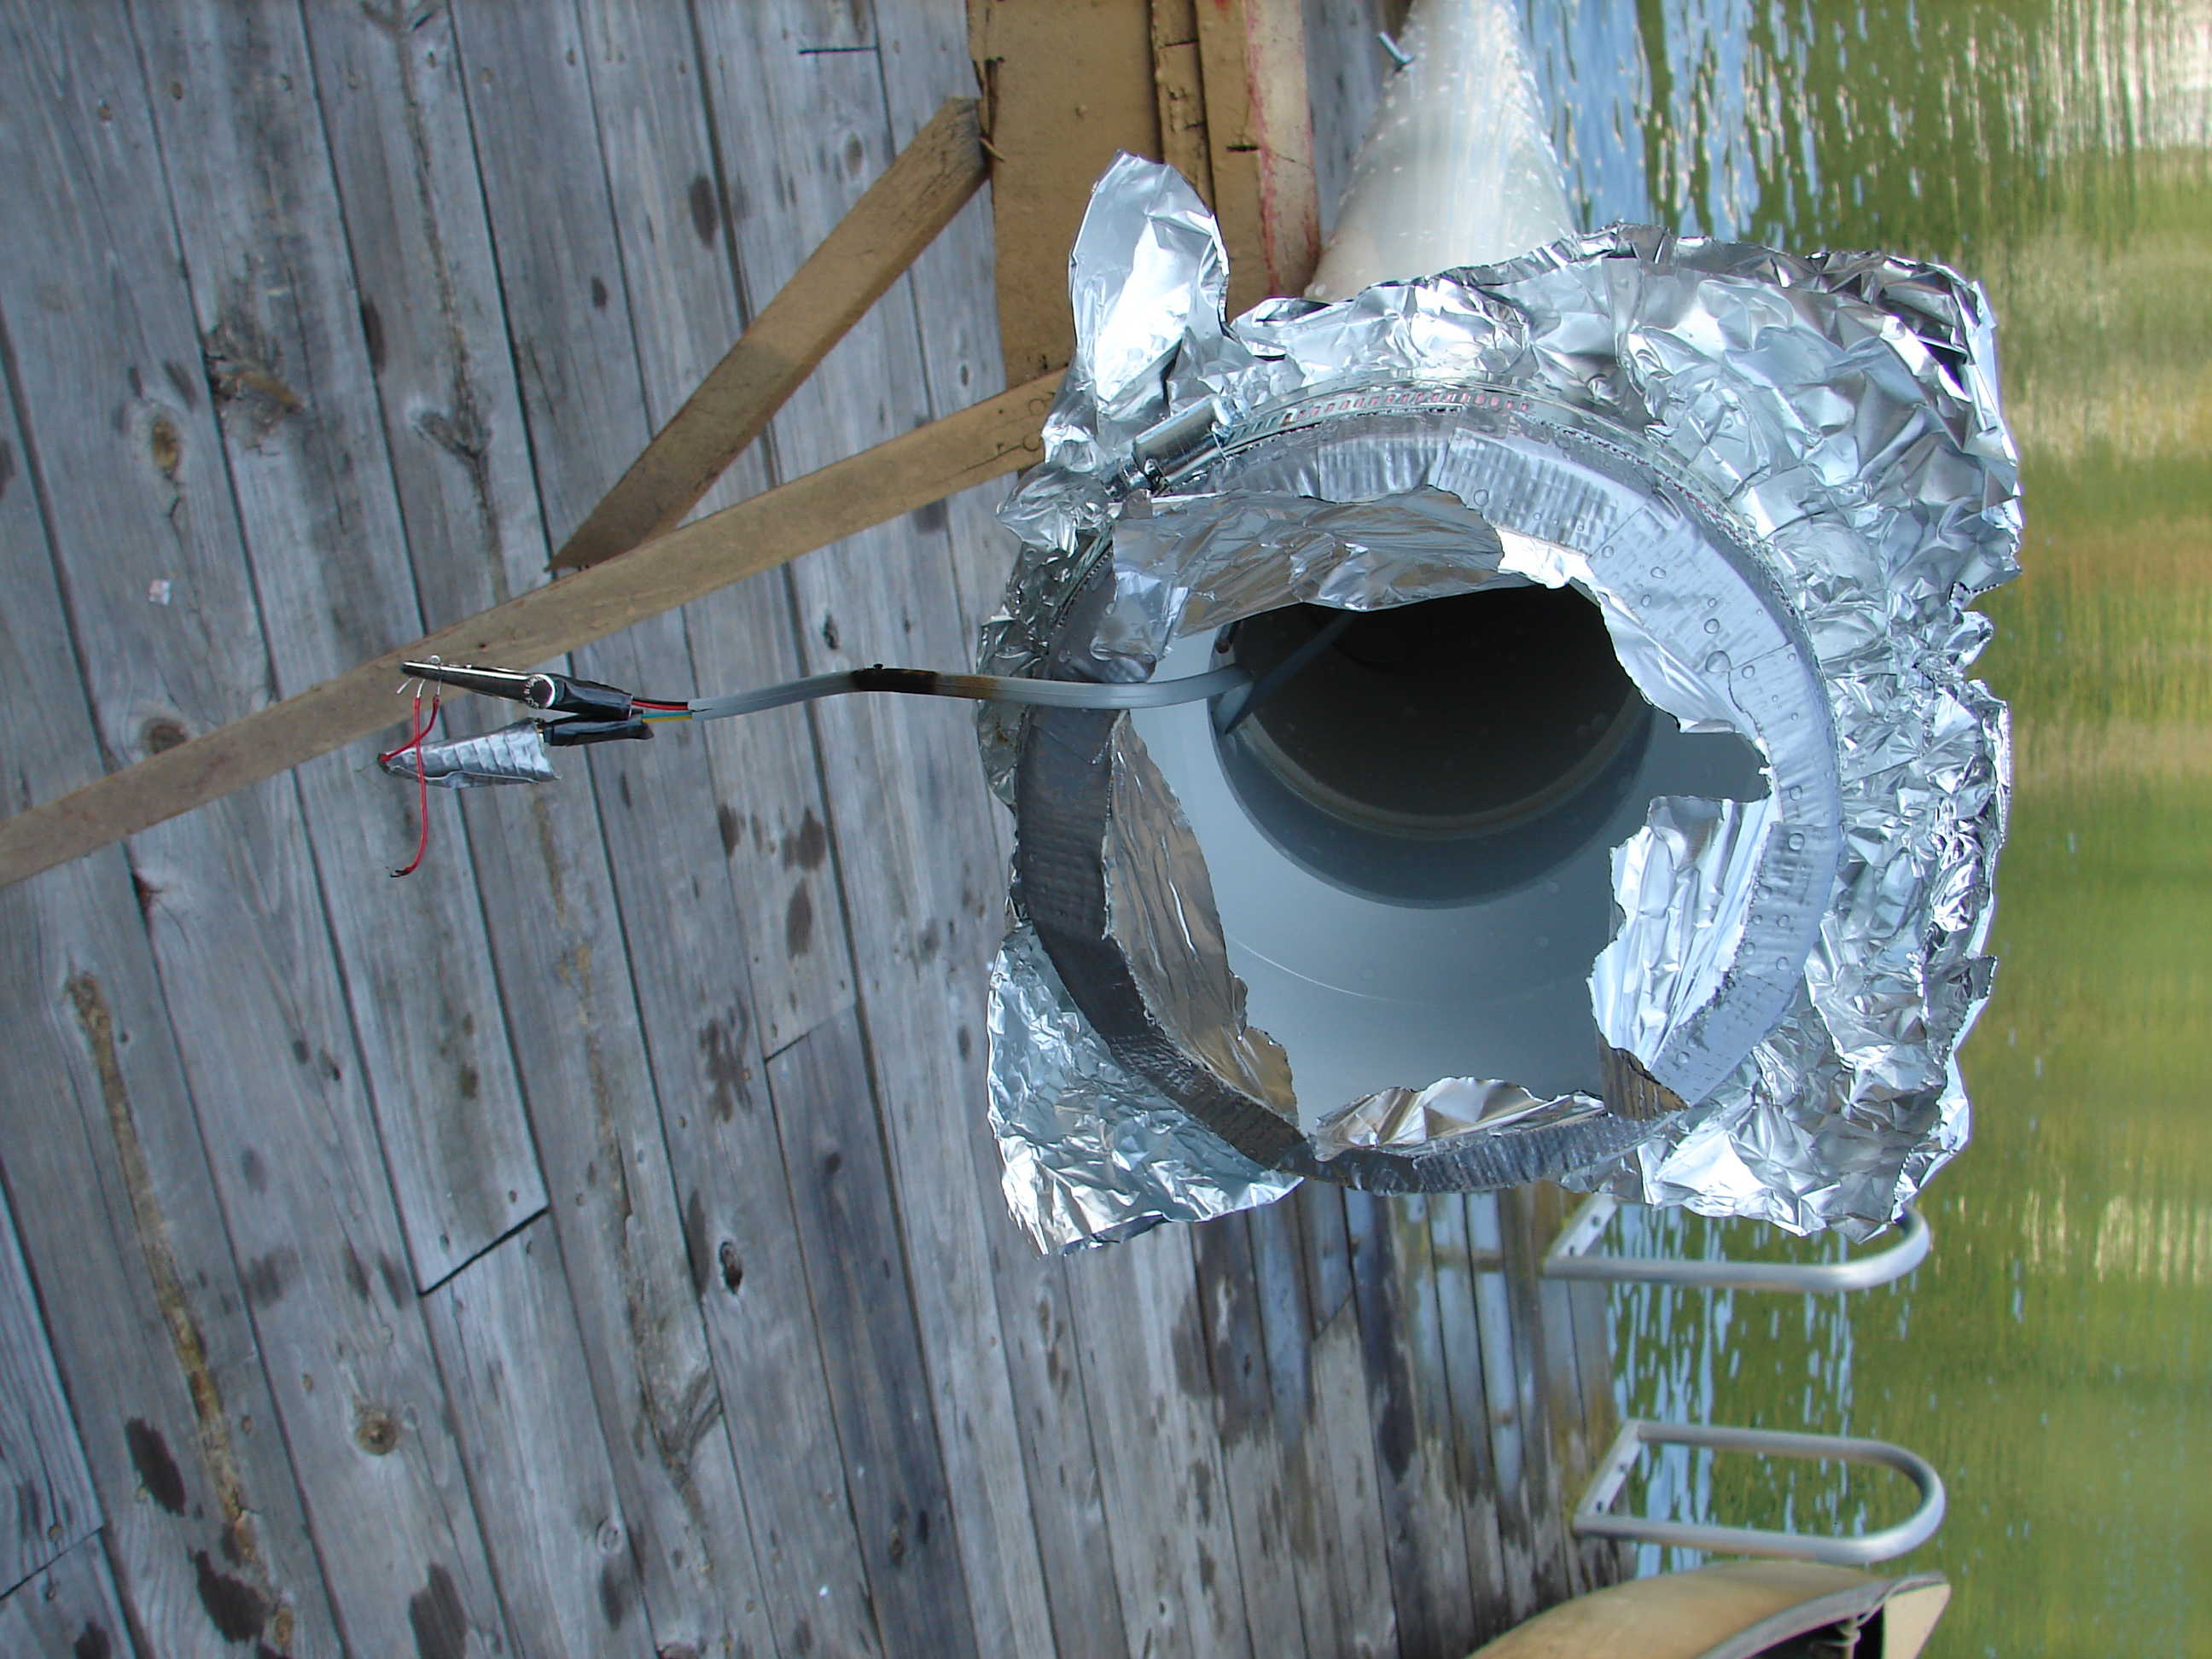
The launch tube was a 10 foot 4 inch diameter pipe, with a 4 inch to 6 inch bushing attached to the top, to increase the area of foil. We used a double layer of heavy-duty kitchen aluminum foil. The two layers were sealed together using rubber cement. The foil was attached with dual hose clamps+rubber band assemblies. The edge of the foil, where it met the PVC pipe was reinforced with duct tape to avoid leaks in that vulnerable area. This marks (as far as I know) the introduction of a new engineering material: Duct Tape Reinforced Aluminum Foil.
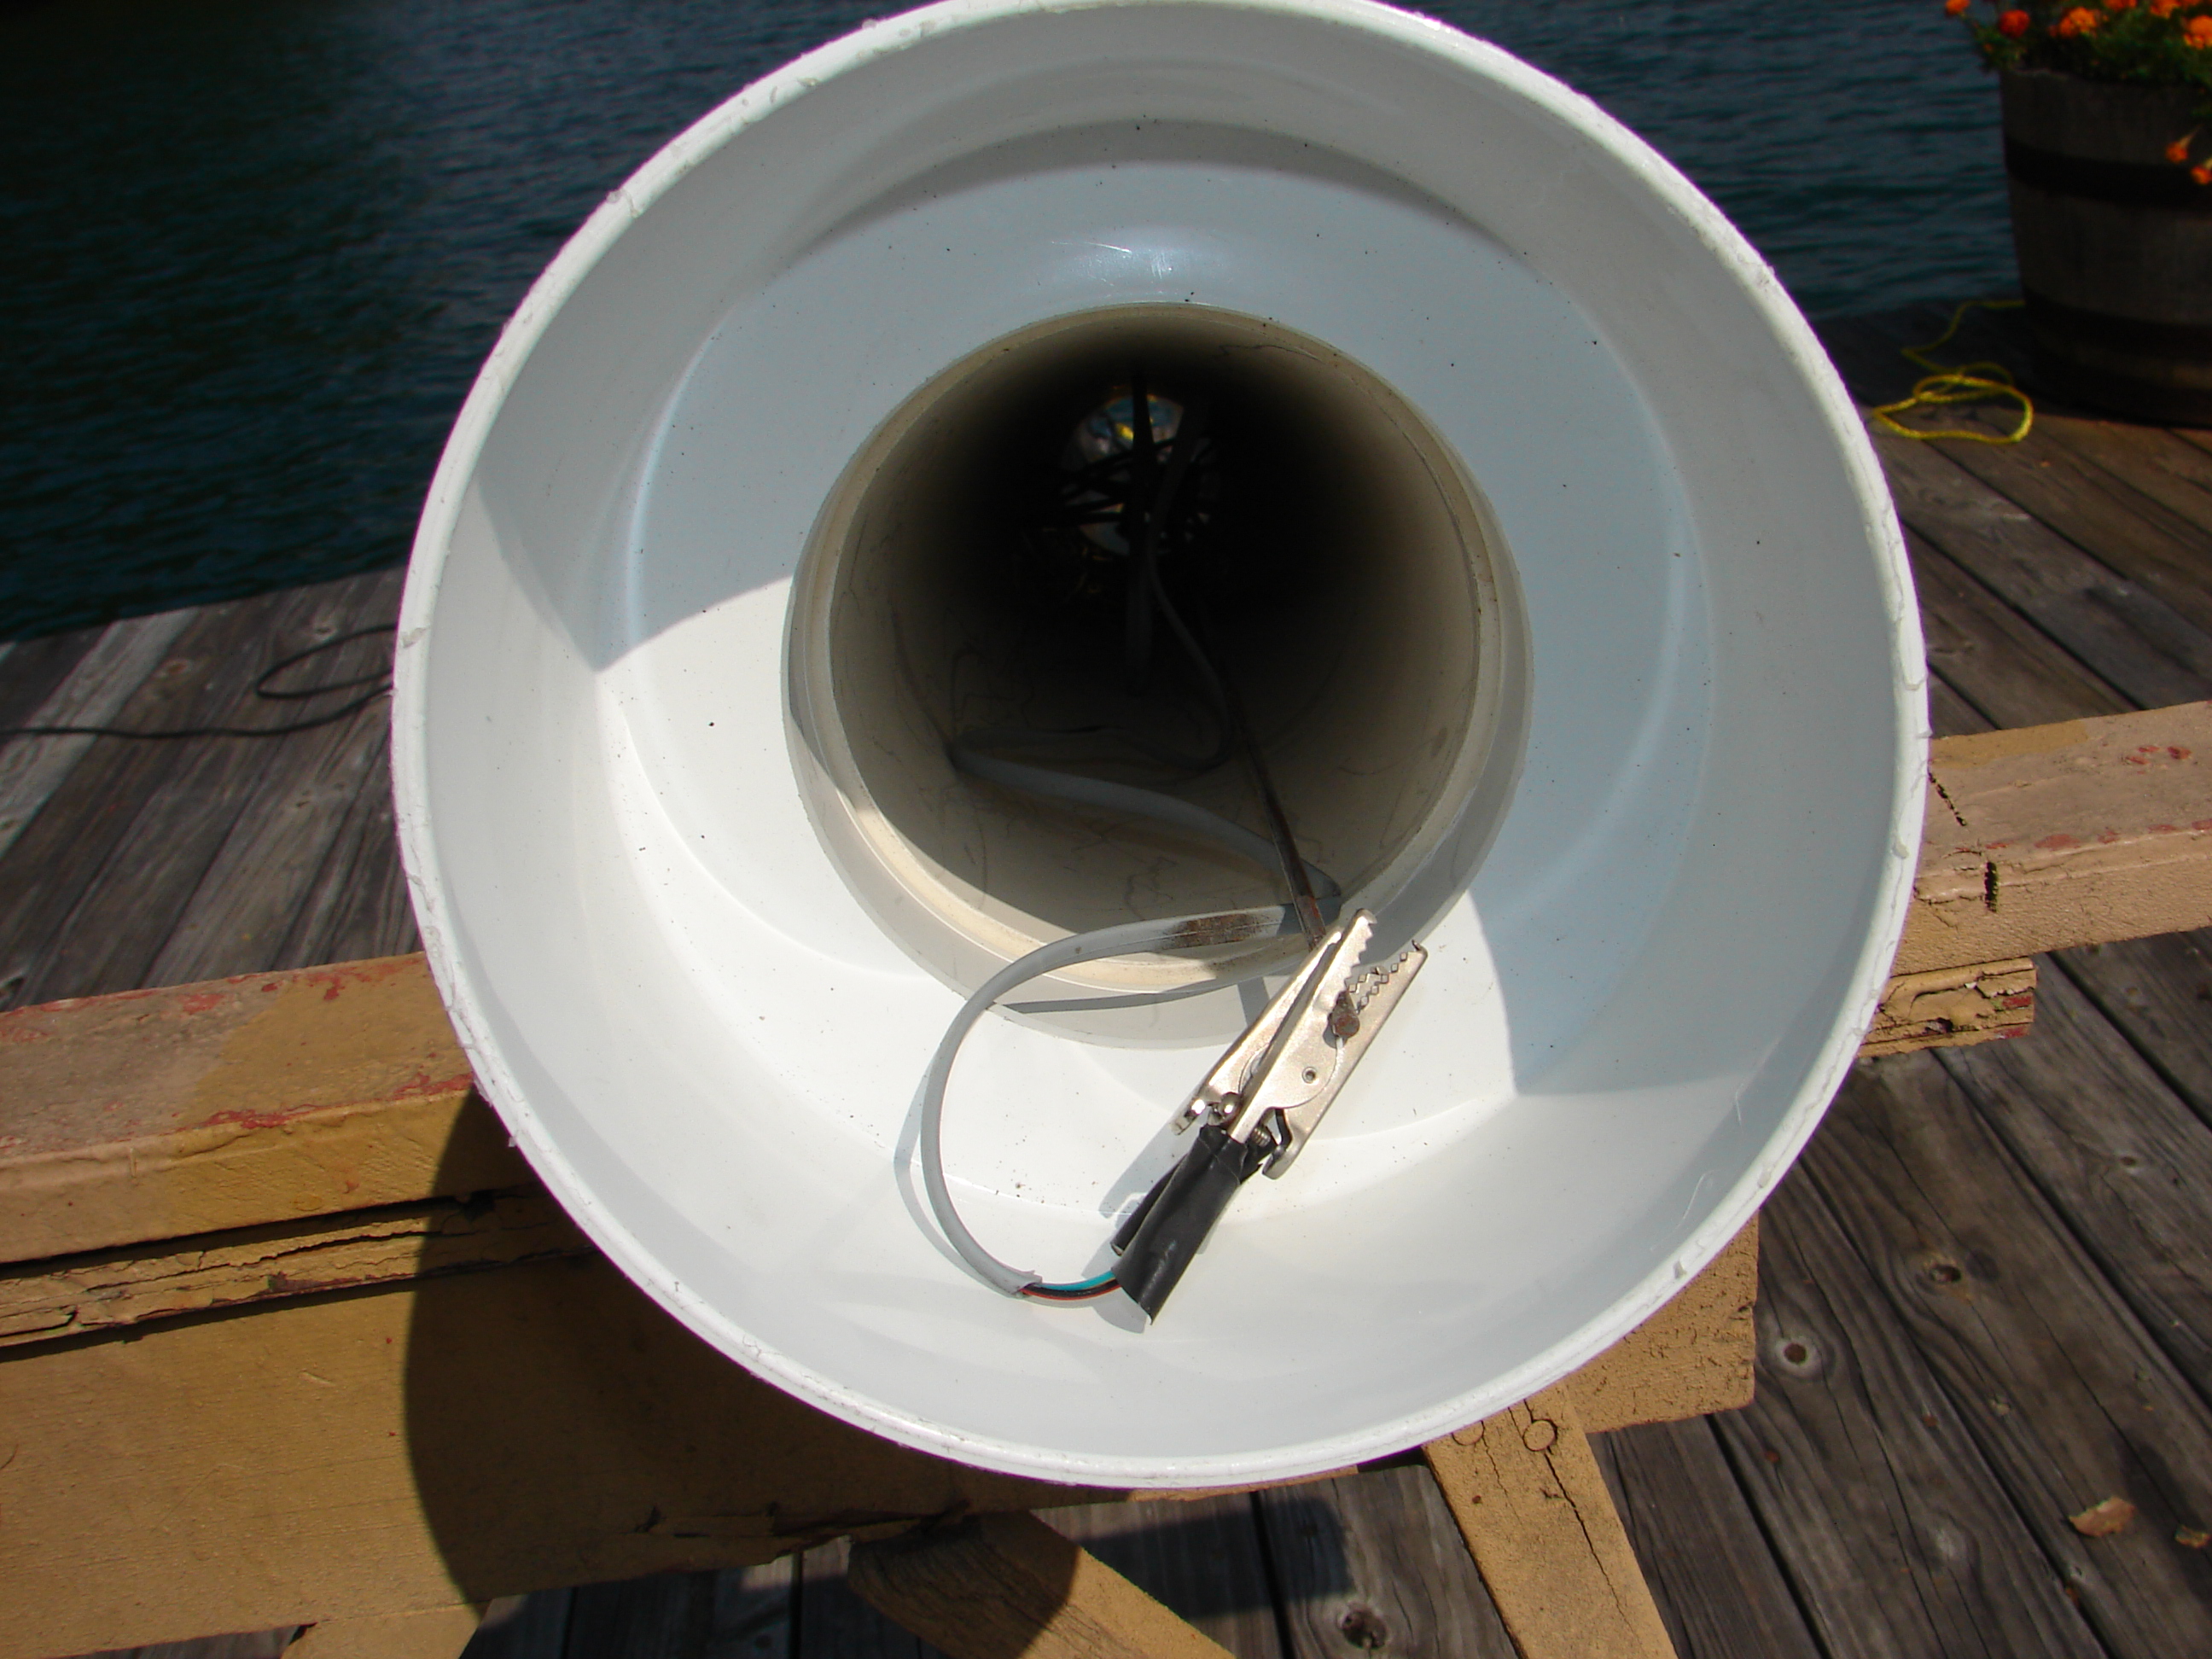
The guide rod assembly consisted of a 4 foot steel wire with one end looped into a "U" around a bolt. A pair of washers and nuts firmly attached the rod at a 90 degree angle to the bolt. The bolt was then attached to the pipe through a hole drilled in the wall, using rubber washers to get a water-tight seal. The ignition system was 50 feet of waterproof low-voltage landscape lighting wire. This was attached to the launch tube by tying it to the bolt anchoring the guide rod. Lightweight telephone cord with alligator clips was used to make the final connection to the igniter. Ignition is powered by a 12volt marine battery.
Labor Day '09, North Georgia
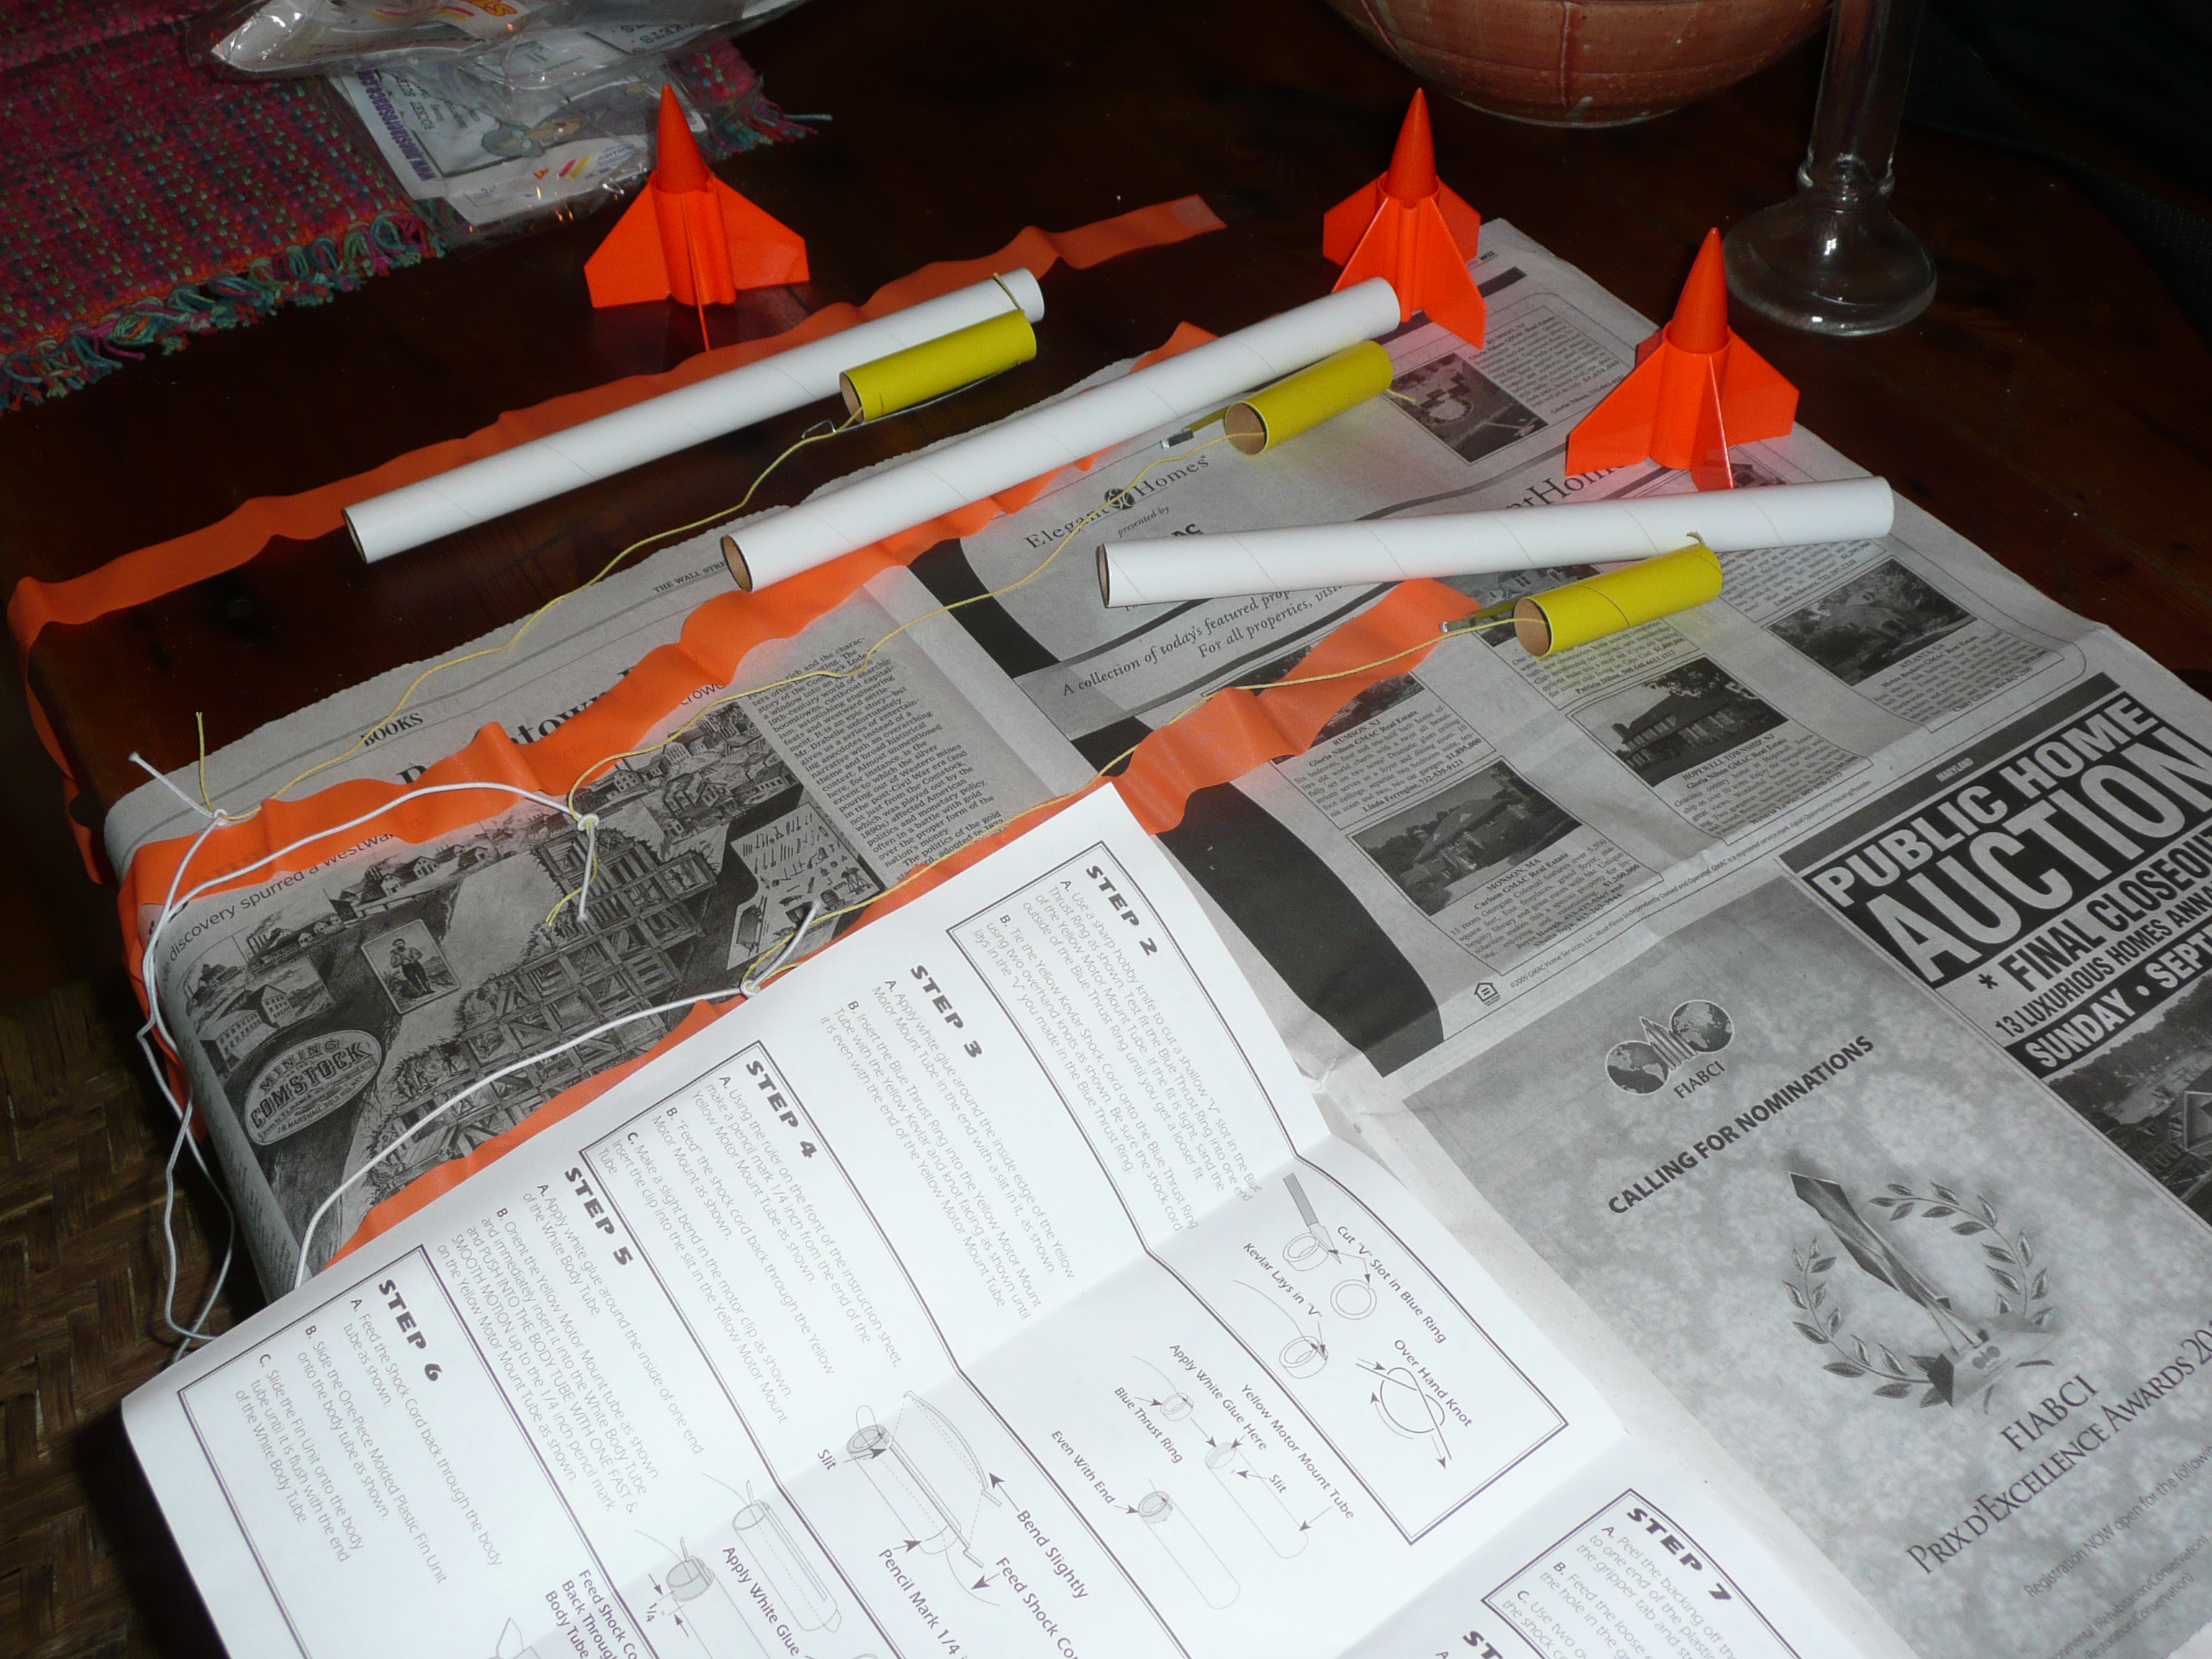
We selected Quest Aerospace "Starhawk" rockets. They have a 1 piece fin assembly, greatly reducing the risk of fins shearing off in dense fluids. They're cheap and available in 6, 12 and 25 packs. And they're designed to be assembled and fired by 9 year olds, so we should have only minor difficulties.
The engine is inserted into the rocket and the ignition system is connected. The prepared rocket is loaded into the launch tube and the foil seal is attached.
Our first test was above water, to make sure the rocket could penetrate the foil, and that the resulting flight path deviation would be minimal. This test was a complete success, using a B engine.
Failure.
The rocket appeared to be on a nearly vertical trajectory in the first frame where it is visible above water. In the second frame, it is ~5 feet above the water, upside down and with the nose cone and recovery streamer fully deployed. The first frame has insufficient detail to determine if the nose cone was still attached.
We had two hypotheses for this failure:
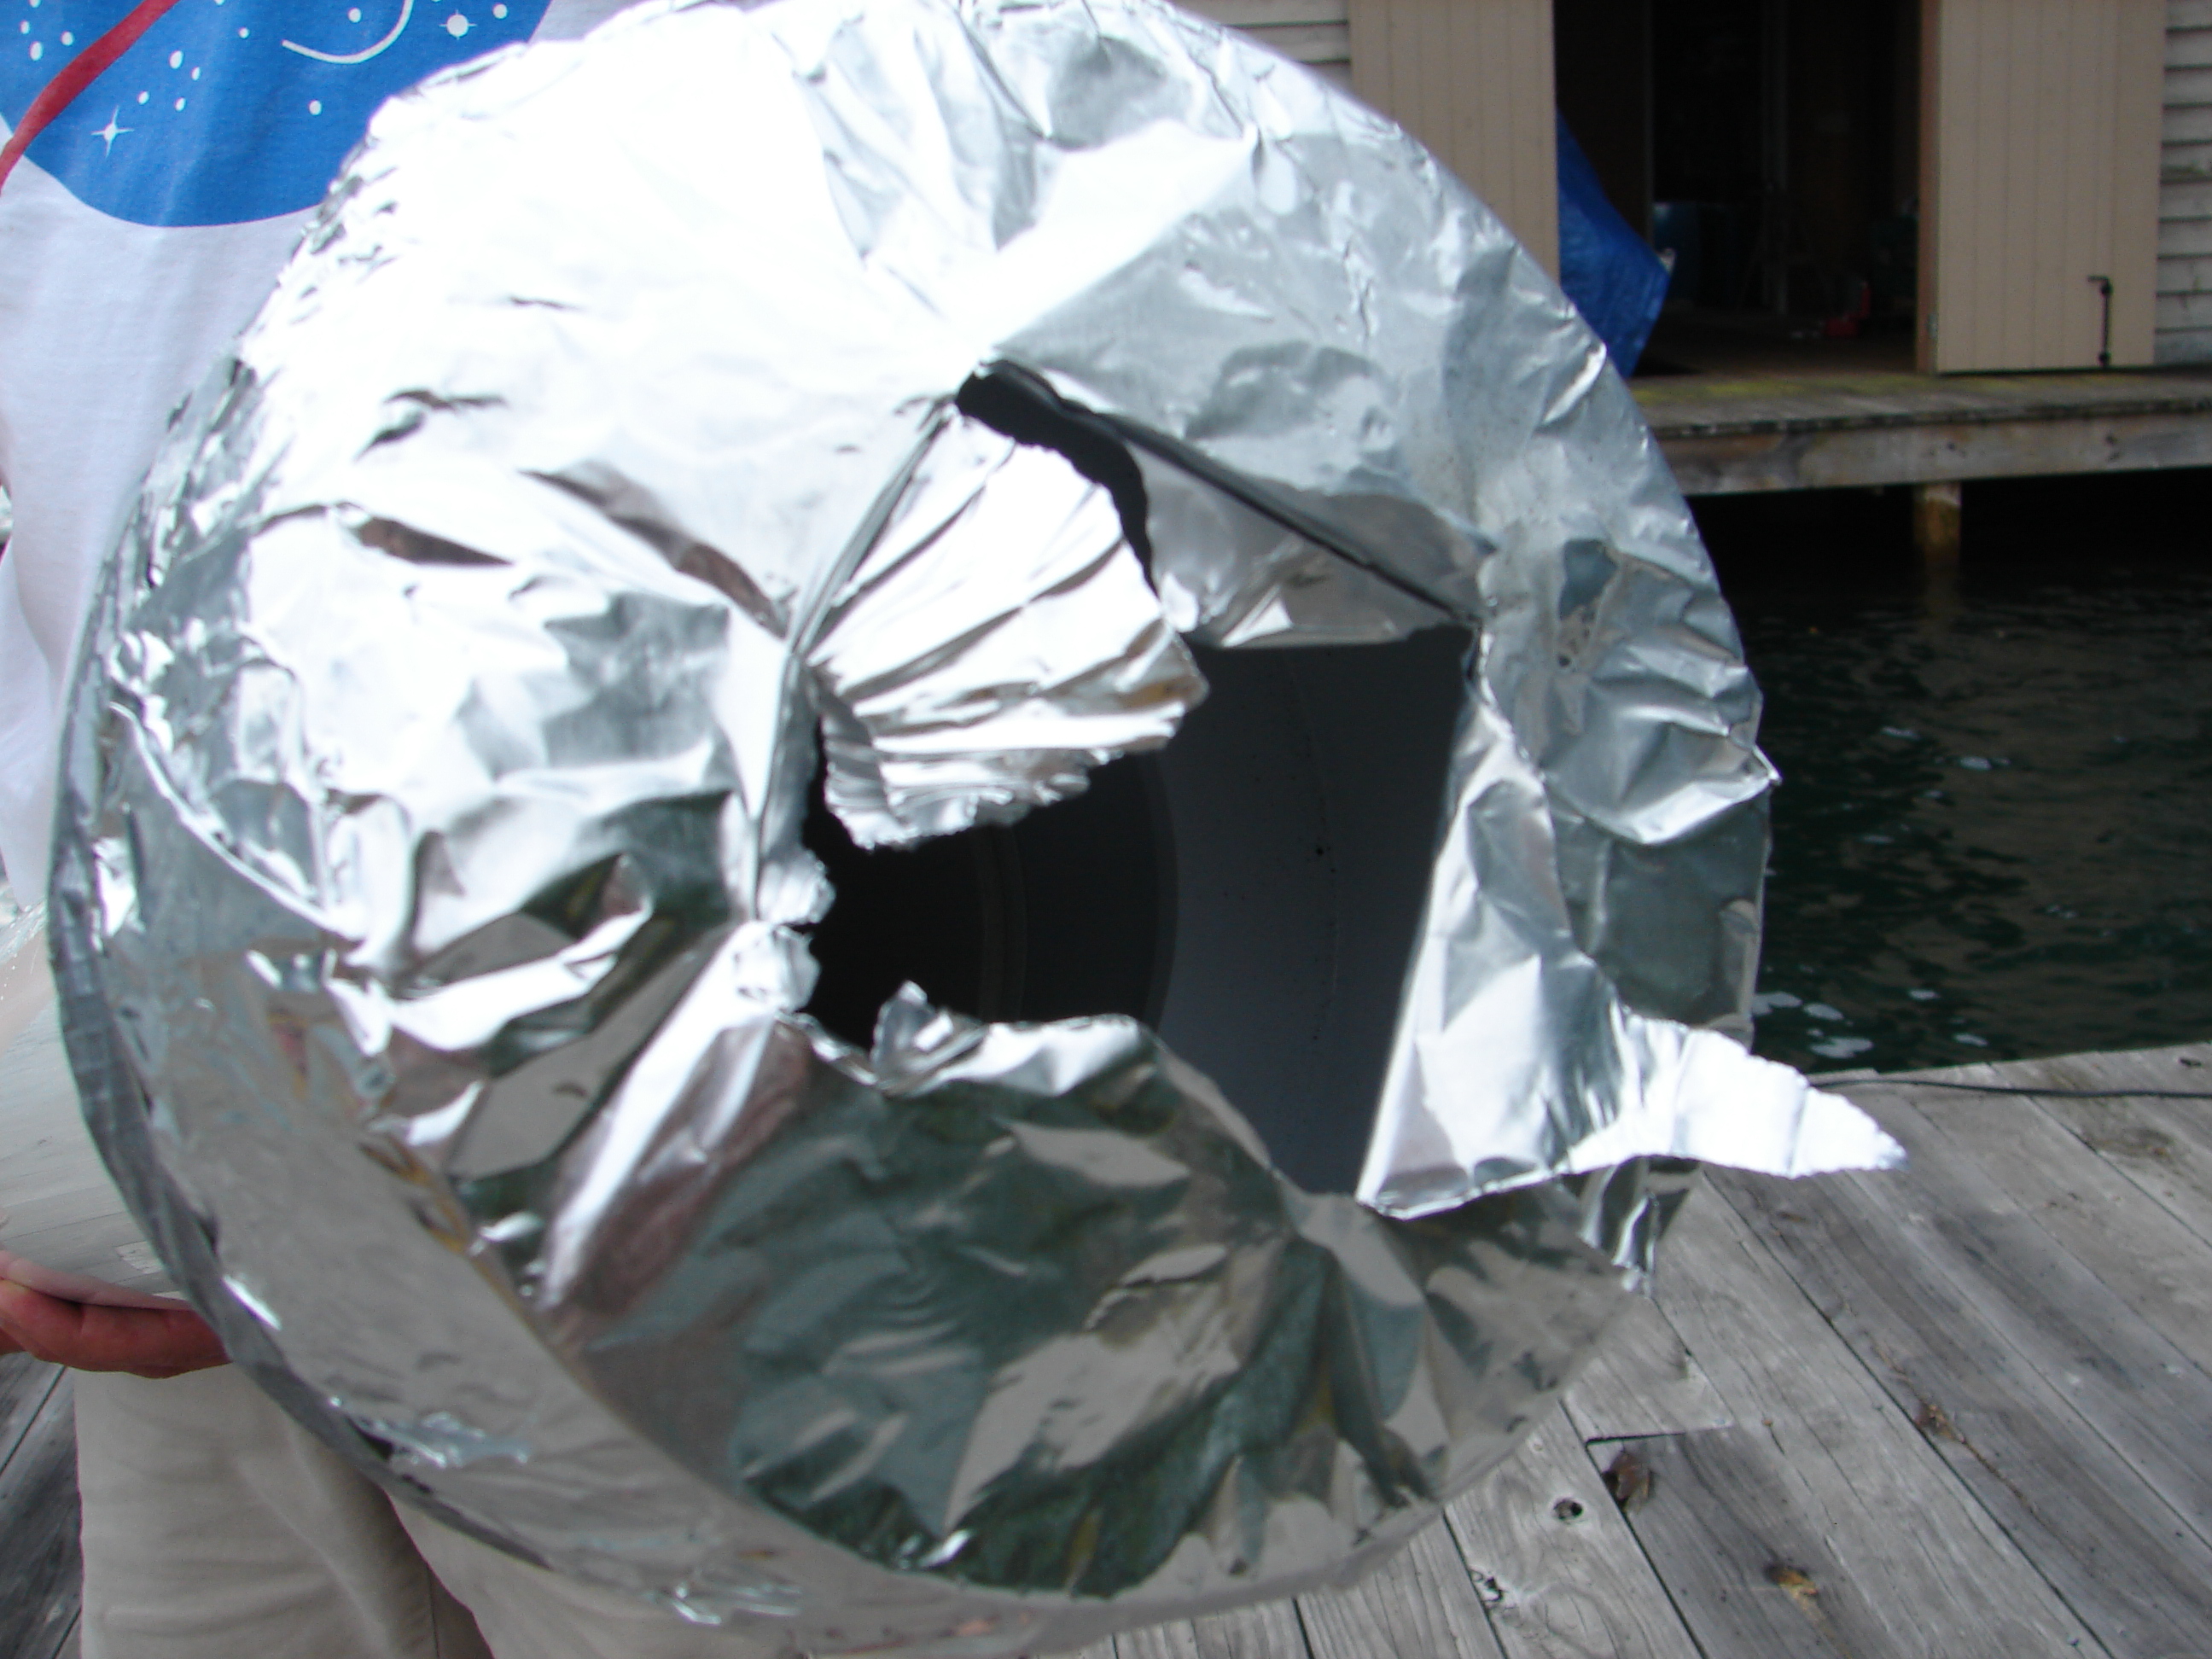
As you can see, the air pressure in the tube caused much more complete destruction of the foil. No doubt this made getting through the foil much easier on the rocket than the above water test, as predicted. Underwater video analysis shows that the escaping air is essentially irrelevant for the rocket's subsequent travel. Hopes that the rocket would glide effortlessly to the surface in a bubble of air were dashed; the rocket outruns the ascending air bubble instantly and is then traveling through unperturbed water.
Success!
The rocket was stable and on a nearly vertical trajectory. Recovery was uneventful.
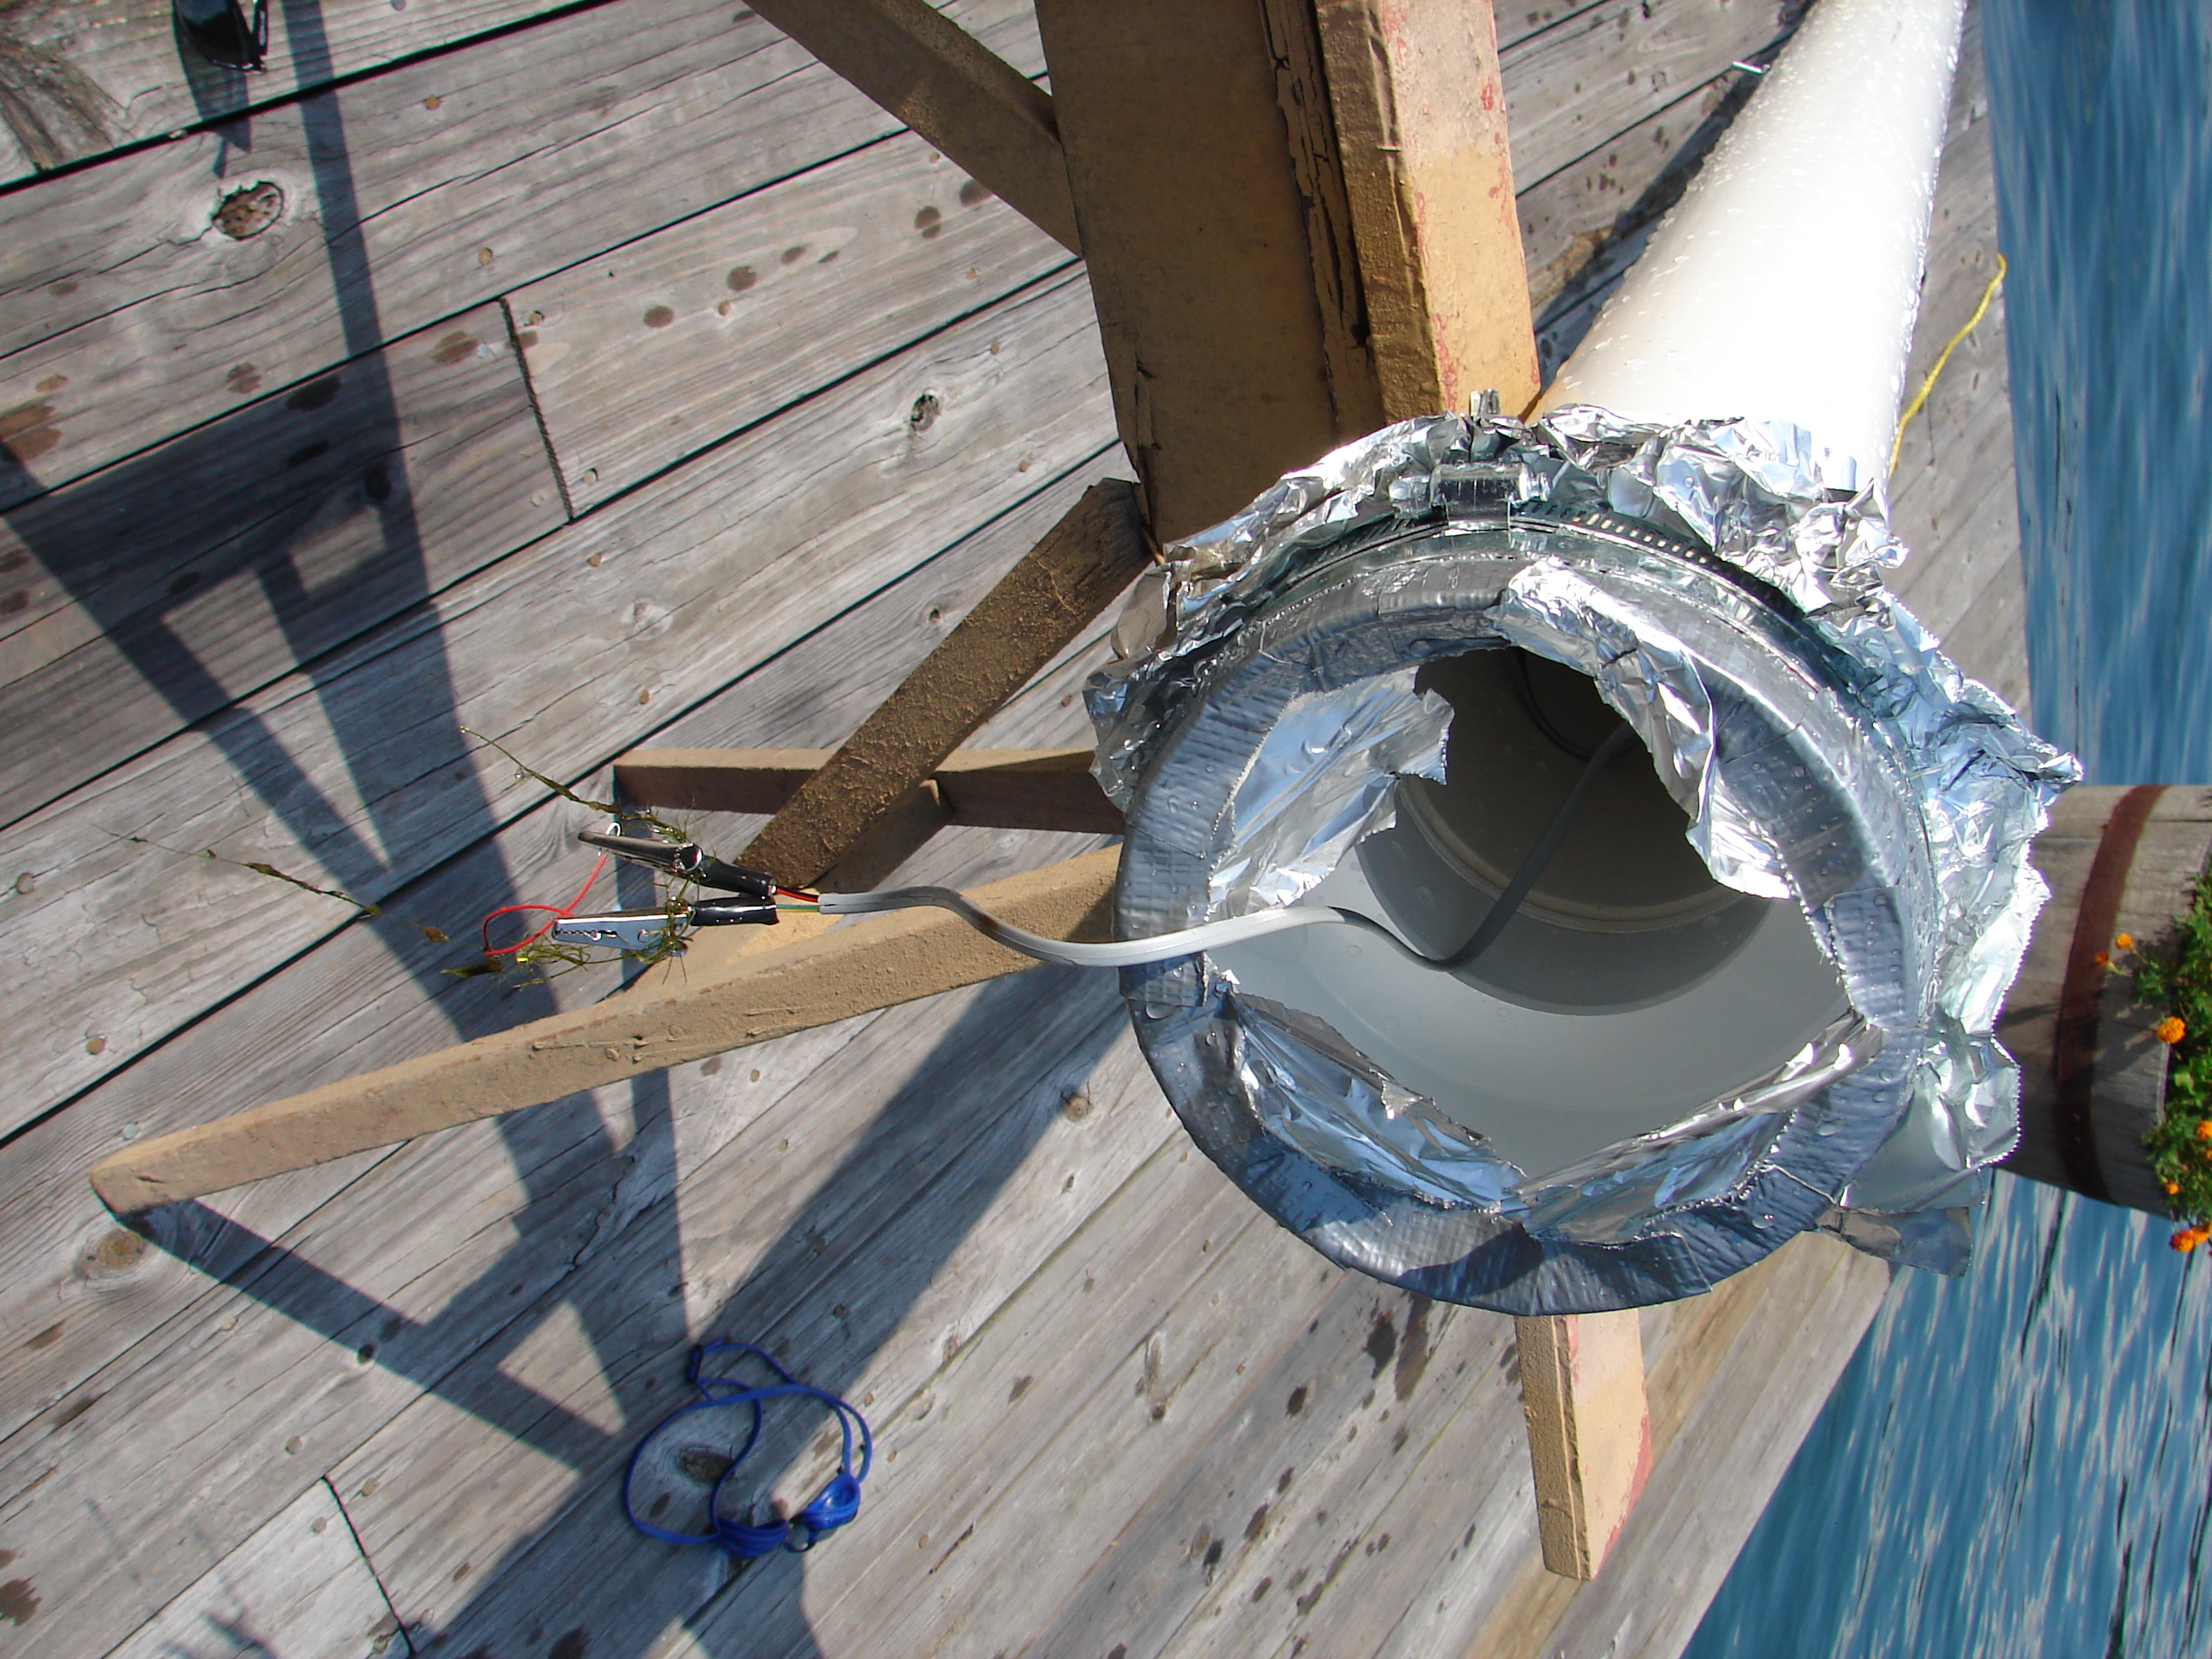
We were so enthralled by the successful flight that we allowed the launch tube to drift all the way to the bottom and rest there, hence the plant matter in the alligator clips.
Success!
Most of the good video came from this launch, including the underwater video. Unfortunately, the microphone on the underwater camera couldn't capture the sheer volume of the noise made by a rocket blasting through pressurized aluminum foil 3 feet away. Trust me that it was intensely loud (and intensely cool).
I declare total success. There were no infuriating igniter failures and 2 successful underwater launches. Even the failure was cool!
I have a much deeper respect for Aluminum the metal, as well as the particular alloy used in commercial kitchen aluminum foil. My profound respect for the versatility of duct tape remains unabated.
Now we just have to figure out how to top this next year.